Showing posts with label WSO2. Show all posts

How to avoid web application deployment faliures due to deployment listener class loading issue. - WSO2 Application Server

WSO2 Application server can be use to deploy web applications and services. For some advance use cases we might need to handle deployment tasks and post deployment tasks. There can be listeners defined globally in repository/conf/tomcat/web.xml to achieve this as follows.

<listener>
  <listener-class>com.test.task.handler.DeployEventGenerator</listener-class>
</listener>


When we deploy web application to WSO2 Application Server sometimes class loading environment can be changed. To fix this we can deploy the webapp with "Carbon" class loading environment. For some use cases we are shipping CXF/Spring dependencies within the web application so any class loader environment other than "CXF" might fail. 

To fix this we need to add file named webapp-classloading.xml to META-INF. Then content should be as follows.

<Classloading xmlns="http://wso2.org/projects/as/classloading">
   <Environments>Carbon</Environments>
</Classloading>

How to avoid dipatching Admin service calls to ELB services - WSO2 ELB

We can front WSO2 services by WSO2 ELB. If we have this kind of deployment all requests to services should route through WSO2 ELB. Some scenarios we might need to invoke admin services deployed in servers through ELB. If you send request to some of back end servers admin service load balancer will try to find that service it self. To avoid that we need to define different service path. So admin services in ELB can access through defined service path and other services will not mix up with it.

For this Then we can change ELB's service context to /elbservices/. Edit  servicePath property in axis2.xml as follows.

<parameter name="servicePath">elbservices</parameter>

How to retrive property and process/iterate them in synapse using xpath and script mediator - WSO2 ESB

Sometimes we need to retrieve properties and manipulate them according to custom requirement. For this i can suggest you two approaches.


01. Retrieve roles list and fetch them using script mediator.
//Store Roles into message context
 <property name="ComingRoles" expression="get-property('transport','ROLES')"/>

//Or you can you following if property is already set to default message context
 <property name="ComingRoles" expression="get-property(''ROLES')"/>


//process them inside script mediator
<script language="js">
            var rolelist = mc.getProperty('ComingRoles');
//Process rolelist and set roles or required data to message context as follows. Here we set same role set
            mc.setProperty('processedRoles',rolelist);
</script>
 <log>
            <property name="Processed Roles List" expression="get-property('processedRoles')"/>
</log>


02. Retrieve roles list and fetch them using xpath support provided.
//Retrive incoming role list
  <property name="ComingRoles" expression="get-property('transport','ROLES')"/>

//Or you can you following if property is already set to default message context
 <property name="ComingRoles" expression="get-property(''ROLES')"/>

//Fetch roles one by one using xpath operations
         <property name="Role1"
                   expression="fn:substring-before(get-property('ComingRoles'),',')"/>
         <property name="RemainingRoles"
                   expression="fn:substring-after(get-property('transport','ROLES'),',')"/>

//Fetch roles one by one using xpath operations
         <property name="Role2"
                   expression="fn:substring-before(get-property('RemainingRoles'),',')"/>
         <property name="RemainingRoles"
                   expression="fn:substring-after(get-property('RemainingRoles'),',')"/>

//Fetch roles one by one using xpath operations
         <property name="Role3" expression="(get-property('RemainingRoles'))"/>

//Then log all properties using log mediator
         <log>
            <property name="testing" expression="get-property('Role1')"/>
         </log>
         <log>
            <property name="testing" expression="get-property('Role2')"/>
         </log>
         <log>
            <property name="testing" expression="get-property('Role3')"/>
         </log>

//Check whether roles list having String "sanjeewa". If so we will set isRolesListHavingSanjeewa as true else its false.
         <log>
            <property name="isRolesListHavingSanjeewa"
                      expression="fn:contains(get-property('transport','ROLES'),'sanjeewa')"/>
         </log>


You will find xpath expressions and sample here(http://www.w3schools.com/xpath/xpath_functions.asp)

Trust all hosts when send https request – How to avoid SSL error when we connect https service

Sometimes when we write client applications we might need to communicate with services exposed over SSL. Some scenarios we might need to skip certificate check from client side. This is bit risky but if we know server and we can trust it we can skip certificate check. Also we can skip host name verification. So basically we are going to trust all certs. See following sample code.

//Connect to Https service     
HttpsURLConnection  conHttps = (HttpsURLConnection) new URL(urlVal).openConnection();
                conHttps.setRequestMethod("HEAD");
                //We will skip host name verification as this is just testing endpoint. This verification skip
                //will be limited only for this connection
                conHttps.setHostnameVerifier(DO_NOT_VERIFY);
                //call trust all hosts method then we will trust all certs
                trustAllHosts();
                if (conHttps.getResponseCode() == HttpURLConnection.HTTP_OK) {
                    return "success";

               }
//Required utility methods
static HostnameVerifier DO_NOT_VERIFY = new HostnameVerifier() {
    public boolean verify(String hostname, SSLSession session) {
        return true;
    }
};

private static void trustAllHosts() {
    // Create a trust manager that does not validate certificate chains
    TrustManager[] trustAllCerts = new TrustManager[] { new X509TrustManager() {
        public java.security.cert.X509Certificate[] getAcceptedIssuers() {
            return new java.security.cert.X509Certificate[] {};
        }

        public void checkClientTrusted(X509Certificate[] chain,
                                       String authType) throws CertificateException {
        }

        public void checkServerTrusted(X509Certificate[] chain,
                                       String authType) throws CertificateException {
        }
    } };

    // Install the all-trusting trust manager
    try {
        SSLContext sc = SSLContext.getInstance("TLS");
        sc.init(null, trustAllCerts, new java.security.SecureRandom());
        HttpsURLConnection
                .setDefaultSSLSocketFactory(sc.getSocketFactory());
    } catch (Exception e) {
        e.printStackTrace();
    }
}

How to skip Host name verification when we do http request over SSL


Sometimes we need to skip host name verification when we do Https call to external server. Most of the cases you will get error saying host name verification failed. In such cases we should implement host name verifier and  return true from verify method.  See following sample code.

HttpsURLConnection conHttps = (HttpsURLConnection) new URL(urlVal).openConnection();

conHttps.setRequestMethod("HEAD");

//We will skip host name verification as this is just testing endpoint. This verification skip

//will be limited only for this connection

conHttps.setHostnameVerifier(DO_NOT_VERIFY);

if (conHttps.getResponseCode() == HttpURLConnection.HTTP_OK) {

//Connection was successful

}

static HostnameVerifier DO_NOT_VERIFY = new HostnameVerifier() {

public boolean verify(String hostname, SSLSession session) {

            return true;

        }

  };

How to build and access message body from custom handler – WSO2 API Manager

From API Manager 1.3.0 onward we will be using pass-through transport inside API Manager. Normally in passthrough we do not build message body. When we use pass-through you need to build message inside handler to access message body. But please note that this is bit costly operations when we compare it with the default mediation. Actually we introduced pass-through transport to improve performance of gateway. There we do not build or touch message body. Add followings to your handler to see message body.


Add following dependency to your handler implementation project


       <dependency>
           <groupId>org.apache.synapse</groupId>
           <artifactId>synapse-nhttp-transport</artifactId>
           <version>2.1.2-wso2v5</version>
       </dependency>


Then import RelayUtils to handler as follows.
import org.apache.synapse.transport.passthru.util.RelayUtils;

Then build message before process message body as follows(add try catch blocks when needed).
RelayUtils.buildMessage(((Axis2MessageContext)messageContext).getAxis2MessageContext());


Then you will be able to access message body as follows.
<soapenv:Body><test>sanjeewa</test></soapenv:Body>

How to clear token cache in gateway nodes – API Manager 1.7.0 distributed deployment


In API Manager deployments we need to clear gateway cache when we regenerate application tokens from API store user interface(or calling revoke API).  So we added new configuration for that in API Manager 1.7.0. Lets see how we can apply it and use.

01. If we generate new application access token from ui old tokens remain as active in gateway cache.

02. If we use revoke API deployed in gateway it will clear only super tenants cache.

To address these issues recently we introduced new parameter named RevokeAPIURL. In distributed deployment we need to configure this parameter in API key manager node. Then it will call API pointed by RevokeAPIURL parameter. RevokeAPIURL parameter should be pointed to revoke API deployed API gateway node. If it is gateway clustered we can point to one node. So from this release(1.7.0) on ward all revoke requests will route to oauth service through revoke API deployed in API manager. When revoke response route through revoke API cache clear handler will invoke. Then it will extract relevant information form transport headers and clear associated cache entries. In distributed deployment we should configure followings.

01. In key manager node, point gateway API revoke end point as follows.

<!-- This the API URL for revoke API. When we revoke tokens revoke requests should go through this

             API deployed in API gateway. Then it will do cache invalidations related to revoked tokens.

    In distributed deployment we should configure this property in key manager node by pointing

    gateway https url. Also please note that we should point gateway revoke service to key manager-->

<RevokeAPIURL>https://${carbon.local.ip}:${https.nio.port}/revoke</RevokeAPIURL>

02. In API gateway revoke API should be pointed to oauth application deployed in key manager node.

  <api name="_WSO2AMRevokeAPI_" context="/revoke">

        <resource methods="POST" url-mapping="/*" faultSequence="_token_fault_">

            <inSequence>

                <send>

                    <endpoint>

                        <address uri="https://keymgt.wso2.com:9445/oauth2/revoke"/>

                    </endpoint>

                </send>

            </inSequence>

            <outSequence>

                <send/>

            </outSequence>

        </resource>

        <handlers>

            <handler class="org.wso2.carbon.apimgt.gateway.handlers.ext.APIManagerCacheExtensionHandler"/>

        </handlers>

    </api>

Fixing issue in WSO2 API Manager due to matching resource found or API authentication failure for a API call with valid access token


No matching resource found error or authentication failure can happen due to few reasons. Here we will discuss about errors can happen due to resource define

Here in this article we will see how resource mapping work in WSO2 API Manager. When you create API with resource we will store them in API Manager database and synapse configuration. When some request comes to gateway it will first look for matching resource and then dispatch to inside that. For this scenario resource is as follows.

/resource1/*

In this configuration * means you can have any string(in request url) after that point. If we take your first resource sample then matching request would be something like this.

http://gatewayhostname:8280/t/test.com/apicontext/resource1/

Above request is the minimum matching request. In addition to that following requests also will map to this resource.

http://gatewayhostname:8280/t/test.com/apicontext/resource1/data?name=value

http://gatewayhostname:8280/t/test.com/apicontext/resource1/data?name=value&id=97

And following requests will not map properly to this resource. The reason for this is we specifically expecting /resource1/ in the request(* means you can have any string after that point).

http://gatewayhostname:8280/t/test.com/apicontext/resource1?name=value&id=97

From the web service call you will get following error response.

<am:fault xmlns:am="403Status'>http://wso2.org/apimanager"><am:code>403</am:code><am:type>Status report</am:type><am:message>Runtime Error</am:message><am:description>No matching resource found in the API for the given request</am:description></am:fault>

If you sent request to t/test.com/apicontext/1.0/resource1?id=97&Token=cd it will not work. Because unfortunately there is no matching resource for that. Because as i explained earlier you resource definition is having  /resource1/*. Then request will not map to any resource and you will get no matching resource found error and auth failure(because trying to authenticate against none existing resource).

Solution for this issue would be something like this.

In API Manager we do support both uri-template and url mapping support. If you create API from API Publisher user interface then it will create url-mapping based definition. From API Manager 1.7.0 on wards we will support both options from UI level. Normally when we need to do some kind of complex pattern matching we use uri-template. So here we will update synapse configuration to use uri-template instead of url-mapping. For this edit wso2admin-AT-test.com--apicontext_v1.0.xml file as follows.

Replace <resource methods="GET" url-mapping="/resource1/*"> with <resource methods="GET" uri-template="/resource1?*">

Hope this will help you to to understand how resource mapping work. You will find more information from this link[1]

[1]http://charithaka.blogspot.com/2014/03/common-mistakes-to-avoid-in-wso2-api.html

How to configure WSO2 API Manager to access by multiple devices(from single user and token) at the same time


This would be very useful when we setup production kind of deployments and use it by many users. According to current architecture if logged out from one device and revoke key then all other call made with that token will get authentication failures. In that case application should be smart enough to detect authentication failure and request for new token. Once user log into application, that user might want to provide user name and password. So we can use that information and consumer/ secret keys to retrieve new token once detect authentication failure. In our honest opinion we should handle this from client application side. If we allowed users to have multiple tokens at the same time. And that will cause to security related issues and finally users will end up with thousands of tokens that user cannot maintain. Also this might be problem when it comes to usage metering and statistics.

 
So recommended solution for this issue is having one active user token at a given time. And make client application aware about error responses send by API Manager gateway. Also you should consider refresh token approach for this application. When you request user token you will get refresh token along with the token response so you can use that for refresh access token.

How this should work

Lets assume same user logged in form desktop and tablet. Client should provide user name and password both when they log into desktop and tablet apps. At that time we can generate token request with username, password and consumer key, secret pair. So we can keep this request in memory until user close or logout from application(we do not persist this data to anywhere then there is no security issue) 

then when they logout from the desktop or the application on the desktop decides to refresh the OAuth Token first, then the user will be prompted for their username and password on the tablet since the tablet has a revoked or inactivated OAuth Token.  But here we should not prompt username password as client is already provided them and we have token request in memory. Once we detect auth failure from tablet app it will immediately send token generation request and get new token. User will not aware about what happen underline.

How to protect you'r API's from common attacks using WSO2 API Manager

WSO2 API Manager is a complete solution for publishing APIs, creating and managing a developer community and for scalably routing API traffic. It leverages proven, production-ready, integration, security and governance components from the WSO2 Enterprise Service Bus, WSO2 Identity Server, andWSO2 Governance Registry. In addition, as it is also powered by the WSO2 Business Activity Monitor, the WSO2 API Manager is ready for massively scalable deployment immediately.

Here in this article i will briefly describe how to protect your actual back end from higher loads of requests and some sort of DOS attacks. Most importantly you can secure, protect and shape up traffic using WSO2 API manager.

In a denial of service attack, the user can send several requests to actual back end service and overload it. Sometimes these requests may have have false return addresses, so the server can't find the user when it tries to send the response back. Also service tries to process so many requests at same time which causes to reduce performance and consume CPU and memory a lot. When server close the connection due to failure, the attacker sends a new batch of forged requests, and the process begins again--tying up the service indefinitely.

One of the more common methods of blocking a "denial of service" attack is to set up a filter or pattern recognition mechanism in front of server before request hits actual back end service. The filter can look for attacks by noticing patterns of incoming traffic. If a pattern comes in frequently, the filter can block messages containing that pattern.

So now we will see how we can achieve this from WSO2 API Manager. If you are familiar with API's you know what API does. If you are using WSO2 API Manager you can engage different throttling policy per each API. Lets say you have one back end which cannot handle 1000 requests same time or so. In that case you can limit concurrent access to that service using API manager. What you have to do is define a throttling policy saying number of concurrent requests  and engage it to your API pointing to actual back end service.

01. Create throttling policy. See following throttling policy which allows 1000 concurrent requests to service.

<wsp:Policy xmlns:wsp="http://schemas.xmlsoap.org/ws/2004/09/policy"
xmlns:wsu="http://docs.oasis-open.org/wss/2004/01/oasis-200401-wss-wssecurity-utility-1.0.xsd"
xmlns:throttle="http://www.wso2.org/products/wso2commons/throttle"
            wsu:Id="WSO2MediatorThrottlingPolicy">
    <throttle:MediatorThrottleAssertion>
        <throttle:MaximumConcurrentAccess>1000</throttle:MaximumConcurrentAccess>
        <wsp:Policy>
            <throttle:ID throttle:type="IP">other</throttle:ID>           
        </wsp:Policy>
    </throttle:MediatorThrottleAssertion>
</wsp:Policy>

02. Upload it as registry resource. For this you can use resource link available in management console of API manager. Go to goverence/apimgt/applicationdata path and upload created policy file. Please make sure to give same path for policy key in API definiton on next step


03. Engage policy to your API as follows. For this you can use source view of synapse configuration editor. Click on source view of API manager management console side menu then you can find configuration related to each and every API created. Add it to your API definition as follows. For example i will take login API.

<?xml version="1.0" encoding="UTF-8"?><api xmlns="http://ws.apache.org/ns/synapse" 
name="_WSO2AMLoginAPI_" context="/login">
    <resource methods="POST" url-mapping="/*">
        <inSequence>
            <send>
                <endpoint>
                    <address uri="https://localhost:9493/oauth2/token"/>
                </endpoint>
            </send>
        </inSequence>
        <outSequence>
            <send/>
        </outSequence>
    </resource>
    <handlers>
 <handler class="org.wso2.carbon.apimgt.gateway.handlers.throttling.APIThrottleHandler">
       <property name="id" value="A"/>
       <property name="policyKey" value="gov:/apimgt/applicationdata/throttle.xml"/>
       </handler> 
<handler class="org.wso2.carbon.apimgt.gateway.handlers.ext.APIManagerExtensionHandler"/>
    </handlers>
</api>

04. test the service

Other common use case is IP address based throttling. For this you may want to limit number of requests send by some client IP(Let say 10 call from single client). So we can use policy shown below. If client from 10.1.1.1 ip address it will allow only 1 API call per minute. If it is any other IP address it will allow only 2 API calls per minute. This is so cool. Isn't it? You can secure, protect, traffic shaping, load balancing using single product

<wsp:Policy xmlns:wsp="http://schemas.xmlsoap.org/ws/2004/09/policy"  
xmlns:throttle="http://www.wso2.org/products/wso2commons/throttle">   
<throttle:MediatorThrottleAssertion>    
<wsp:Policy>            
<throttle:ID throttle:type="IP">10.1.1.1</throttle:ID>            
<wsp:Policy>                
<throttle:Control>                    
<wsp:Policy>                        
<throttle:MaximumCount>1</throttle:MaximumCount>                        
<throttle:UnitTime>60000</throttle:UnitTime>                    
</wsp:Policy>                
</throttle:Control>           
</wsp:Policy>        
</wsp:Policy>
     
<wsp:Policy>            
<throttle:ID throttle:type="IP">other</throttle:ID>            
<wsp:Policy>                
<throttle:Control>                    
<wsp:Policy>                        
<throttle:MaximumCount>2</throttle:MaximumCount>                        
<throttle:UnitTime>60000</throttle:UnitTime>                   
 </wsp:Policy>                
</throttle:Control>            
</wsp:Policy>        
</wsp:Policy>    
</throttle:MediatorThrottleAssertion></wsp:Policy> 

WSO2 API Manager - How to use thrift for api validation call between Gateway and Keymgt servers

WSO2 API Manager is a complete solution for publishing APIs, creating and managing a developer community and for scalably routing API traffic. It leverages proven, production-ready, integration, security and governance components from the WSO2 Enterprise Service Bus, WSO2 Identity Server, andWSO2 Governance Registry. In addition, as it is also powered by the WSO2 Business Activity Monitor, the WSO2 API Manager is ready for massively scalable deployment immediately.

If we deployed API Manager in a distributed way we have separate keymgt server for validation and authentication purpose. Normally when some api call hits API gateway it do some security check. For that verification we pass access token, api, api version. So once any API call hits gateway it will extract those parameters and do check whether this token is valid one or not. Its very simple and straight forward. For that gateway calls to Keymgt server per each call if cache is not available at gateway side. As we all know web service call is always bit costly operation. So we thought its better if we can put thrift there. So thrift implementation for validation call will be available in next generally available release of API Manager 1.0.1 (not in 1.0.0 release).

So here in this post i will describe how to add configurations for that change. Here i will describe how should we do this for distributed setup. Let say we have 2 gateway nodes 2 keymgt nodes in four different machines. So ideally 2 thrift servers should run in both keymgt nodes and 2 clients should run on gateway nodes. So when api call comes gateway does a call to keymgt and load balancer sent it to one keymgt node based on load balancer algorithm.

If each node runs on different machines we can have identical configuration for both gateway nodes and same applies to keymgt as well. This

So Add following entries to APIKeyManager section of api-manager.xml file available in /repository/conf (gateway node). So ServerURL parameter says where is keymgt server is running in addition to that we have to specify thrift client port(it is the same as thrift server port of keymgt node). Actually its not necessary to run thrift server at gateway node but we will keep it as completeness.

&lt;ServerURL>https://192.168.113.209:9493/services/&lt;/ServerURL>
&lt;KeyValidatorClientType>ThriftClient&lt;/KeyValidatorClientType>
&lt;ThriftClientPort>10397&lt;/ThriftClientPort>
&lt;ThriftClientConnectionTimeOut>10000&lt;/ThriftClientConnectionTimeOut>
&lt;ThriftServerPort>10399&lt;/ThriftServerPort>


So Add following entries to APIKeyManager section of api-manager.xml file available in /repository/conf (keymgt node). Here important parameter is thrift server port as gateway tries to connect it.

&lt;KeyValidatorClientType>ThriftClient&lt;/KeyValidatorClientType>
&lt;ThriftClientPort>10398&lt;/ThriftClientPort>
&lt;ThriftClientConnectionTimeOut>10000&lt;/ThriftClientConnectionTimeOut>
&lt;ThriftServerPort>10397&lt;/ThriftServerPort>


So we have done the configurations. Then copy necessary thrift jar files to repository/component/dropins folder and restart both servers.If you want to go back to web service call change key validator client type in to WSClient

WSO2 API Manager advanced validation information caching configurations

WSO2 API Manager is a complete solution for publishing APIs, creating and managing a developer community and for scalably routing API traffic. It leverages proven, production-ready, integration, security and governance components from the WSO2 Enterprise Service Bus, WSO2 Identity Server, andWSO2 Governance Registry. In addition, as it is also powered by the WSO2 Business Activity Monitor, the WSO2 API Manager is ready for massively scalable deployment immediately.
 
If we deployed API Manager in a distributed way we have focus on few important things. Caching is one of the most important thing. Normally when some api call hits API gateway it do some security check. For that verification we pass access token, api, api version. So once any API call hits gateway it will extract those parameters and do check whether this token is valid one or not. Its very simple and straight forward. But as we know gateway hits all most all the traffic goes to actual apis. So this verification process should faster one. For that we are using cache. So we cache validation information object with the key containing token, api name and version. This cache can store at gateway side or keymgt side. Please note that these configurations are valid only after API Manager 1.0.0 release and its not available on 1.0.0 main release. Here we can consider 2 main scenarios.

01. Cache at gateway side.
If cache is available at gateway side when request hits gateway it first populate cached entry for given token and if it is not available on cache it will cal to keymgt server. Normally this happens through web service call. so once keymgt returns validation information we can store it in gateway. This is obviously fastest way of doing this as this reduces web service calls to keymgt server.

02. Cache at keymgt side.
For each call hits gateway it calls to keymgt server and there is a cache at keymgt side. So if entry is available in cache it returns else do database call and check the validity of the token. This method has known performance issue as it there is a web service call to keymgt server form gateway for each api call. But advantage of this method is we do not have to store any security related information at gateway side.

For each validation information object we have JWT token. Normally it also got cached with validation information object. But in some scenarios you might want to generate JWT per each call. So we can do that by using configuration. But please note that we can do this only when cache resides at keymgt side.

If you didn't set any of these configurations  (by default) cache is available at gateway side and JWT is also cached with validation information object we are using this as default configuration as its the fastest way. If you need to change default configuration follow given instructions.

Move cache to keymgt server form gateway
Disable the caching at gateway side by adding following entry to APIGateway section of api-manager.xml file available in /repository/conf (gateway node)

<EnableGatewayKeyCache>false</EnableGatewayKeyCache>


Enable ketmgt server side caching by adding following entry to APIKeyManager section of api-manager.xml file available in /repository/conf (keymgt node)

<EnableKeyMgtValidationInfoCache>true</EnableKeyMgtValidationInfoCache>


If you want to disable or enable JWT caching at keymgt server side add following entry to APIKeyManager section of api-manager.xml file available in /repository/conf (keymgt node).

<EnableJWTCache>false</EnableJWTCache>


Also please note that you have to add following entry to the root level of api-manager.xml file available in /repository/conf (keymgt node) to generate JWT token at keymgt server side.

<APIConsumerAuthentication.EnableTokenGeneration>
true
</APIConsumerAuthentication.EnableTokenGeneration>

WSO2 API Manager Introduction-1

WSO2 API Manager is a complete solution for publishing APIs, creating and managing a developer community and for scalably routing API traffic. It leverages proven, production-ready, integration, security and governance components from the WSO2 Enterprise Service Bus, WSO2 Identity Server, andWSO2 Governance Registry. In addition, as it is also powered by the WSO2 Business Activity Monitor, the WSO2 API Manager is ready for massively scalable deployment immediately. Here in this post i will briefly describe key functionalities and terms in WSO2 API manager.

API Gateway
This is responsible for securing, protect, manage, and scale API calls. The API gateway is a simple API proxy which intercepts API requests and applies policies such as throttling and security checks. It is also instrumental in gathering API usage statistics. We are using set for handlers to security validation and throttling purposes.  It will pass web service call to actual back end after these validation steps. If it is token request call then directly pass to keymgt server to handle it. We can add remove these handlers using source view of synapse configuration. When it comes to production deployments this server hits higher number of requests as all api calls goes through this server. So we have to handle this very carefully. Fine tuning and additional configuration changes according to environment is must to achieve highest performance

API Publisher
This enables API providers to easily publish their APIs, share documentation,provision API keys, and gather feedback on APIs features, quality and usage. You can create new apis by pointing to actual back end service and also define rate limiting policies available for this api.
Here are the some of publisher features.
Create, manage API and publish them to gateway.
Monitor API consumers, behaviour, response time, last accessed time and etc.
List the active subscriptions per each API.
Manage life cycles versions and policies. Based on the state of API you can set it to any of following state.
CREATED: API metadata has been added to API store, but it is not visible to subscribers
yet, nor deployed to the API gateway
PUBLISHED: API is visible in API store, and eventually ( if the “Push to Gateway” option is selected at publishing time)
DEPRECATED: API is still deployed into API gateway (available at runtime to existing users) but not visible to subscribers. An API can automatically be deprecated when a new version is published.
RETIRED: API is not unpublished from the API gateway and retired.
BLOCKED: Access is temporarily blocked.

API Store
Provides a space for consumers to self-register, discover APIs functionality, subscribe to APIs, evaluate them and interact with API publishers. Here users can come and view existing apis created and self sign in. After that they can create their own application by bundle multiple apis together to one application. Once user creates application he can generate 3 type of keys.
Application Token - This is security token that can use to call created application API’s
Consumer key, Consumer secret key – These key pair can use to generate a new access token for given application and user.
Later we will see how we can use these key to make actual API call. Here are the feature list for API store.
View top used, new featured APIs and search by name, tag or creator.
API rate, share comments, feature requests and participate forum discussions.
Create, manage application, add remove APIs to application.
Generate application keys consumer and consumer secret keys for application.
Download help and documents contact owners of API and ask questions.
Self-signup for API consumption.

API Key Manager Server
This is responsible for all security and key related operations. Normally when gateway hits API call it calls keymgt service and verify the validity of token provided. And if gateway gets login call it directly forward it to keymgt server. If we discuss little bit about this login call its basically use for get a new access token. So for this we have to pass user name, password, consumer key and consumer secret key you got when you register your application. All tokens use for validation are based on OAuth 2.0.0 protocol.  All secure authorization of APIs is provided using the OAuth 2.0 standard for key management. The API gateway supports API authentication with OAuth 2.0, and it enables IT organizations to enforce rate limits and throttling policies for APIs by consumer.


There are 3 types of users we can consider in API story. Here are those. These roles are based on the privileges they have and tasks they perform.

Creator( The technical owner of an API)
A creator will typically be a person in a technical role who understands the technical aspects of the API (interfaces, documentation, versions, how it will be exposed by API gateway) and uses the API publisher web application to provision APIs into the API store. The creator will use the API store to consult ratings and feedback provided by API users. Creator can add APIs to the store but cannot manage their lifecycle

Publisher( The business owner of an API)
The publisher typically manages a set of APIs across the enterprise or business unit and controls the API lifecycle and monetization aspects. The publisher is also interested in usage patterns for APIs and as such has access to all API statistics.

Consumer(The developer or consumer of an API)
the consumer uses the API store to discover APIs, consult the documentation and forums as well as rate/comments on the API. He/she subscribes to APIs to obtain an API key. Consumers can bundle multiple API’s together into one application and use it. Actual application consumers are user devices it may be computer application or mobile application.
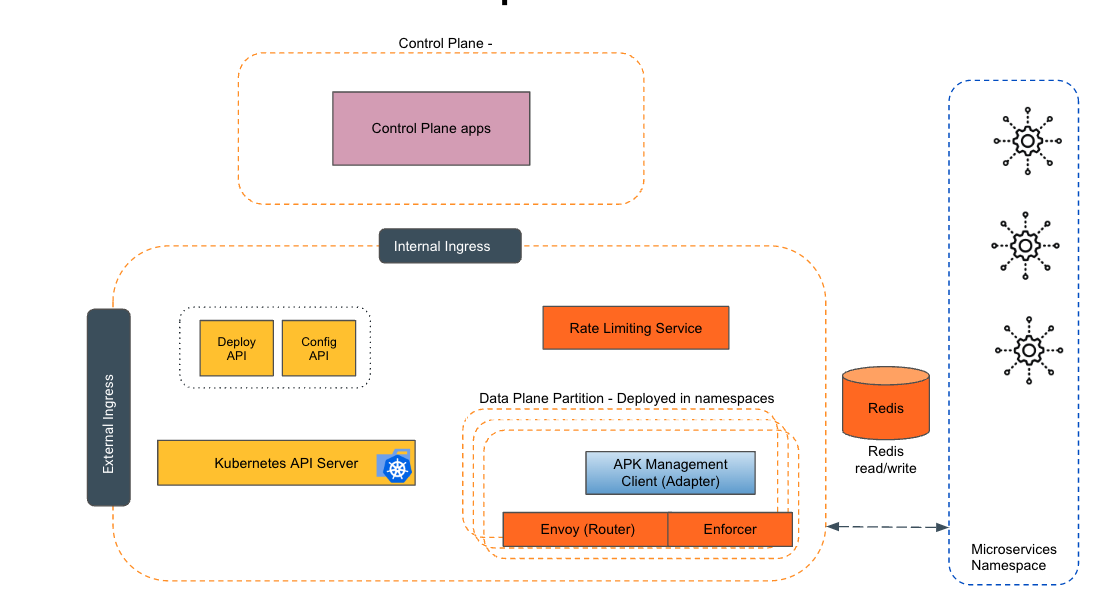
See the following diagram to understand this concept clearly.

Presentation1

How to enable/disable cache for API Key validation information and JWT token in WSO2 API Manager

WSO2 API Manager is a complete solution for publishing APIs, creating and managing a developer community and for scalably routing API traffic. It leverages proven, production-ready, integration, security and governance components from the WSO2 Enterprise Service Bus, WSO2 Identity Server, and WSO2 Governance Registry. In addition, as it is also powered by the WSO2 Business Activity Monitor, the WSO2 API Manager is ready for massively scalable deployment immediately.

According to wiki cache is a mechanism for the temporary storage (caching). So we use cache in WSO2 products to achieve higher performance. Please refer my previous article on replicate caching of API manager. So if we did a distributed deployment based on requirement we can decide whether we keep key validation information cache in gateway side or keymgt side. If you deployed both nodes in same data centre and do not worry about network overhead added you can keep cache at keymgt side. Else you can keep cache in gateway side. This is the best way of doing this since it prevents additional web service call. Lests see how we can configure it from gateway side.
Add the following lines under tag in api-manager.xml found under /repository/conf.

<EnableGatewayKeyCache>false</EnableGatewayKeyCache>


So above configuration will disable API gateway side ley validation information cache. Then it will call to keymgt per each incoming request.

Also we can cache JWT token with api key validation information. We can do this in keymgt node. Lets see how we could do this. This is also important as JWT generation is bit costly operation.
Add the following lines under tag in api-manager.xml found under /repository/conf.

<EnableJWTCache>false</EnableJWTCache>


So above configuration disable JWT cache which means generate new JWT token per each call to keymgt server.

How to add user claims as custom header of login response of WSO2 API Manager

WSO2 API Manager is a complete solution for publishing APIs, creating and managing a developer community and for scalably routing API traffic. It leverages proven, production-ready, integration, security and governance components from the WSO2 Enterprise Service Bus, WSO2 Identity Server, and WSO2 Governance Registry. In addition, as it is also powered by the WSO2 Business Activity Monitor, the WSO2 API Manager is ready for massively scalable deployment immediately.

Sometimes users may want to get some user claims as response headers of login call response message. Let say if you have your own implementation of JDBC User store manager you might have different user claims. So here we will see how we can use configurations to retrieve them as headers. This is bit complex use case which might not use by each and every one. I did this post because we support this feature and for my future reference.

In the identity.xml add following section (with the claims you need)
<OAuth>.....</OAuth>

When you define the claim - DisplayName will appear as the HTTP Header name in the response.

<RequiredRespHeaderClaimUris>
<ClaimUri>http://wso2.org/claims/emailaddress</ClaimUri>
<ClaimUri>http://wso2.org/claims/gender</ClaimUri>
 </RequiredRespHeaderClaimUris>

 Send curl request as follows :
curl -v -X POST -H "Authorization: Basic Z3pidExIS3NsTVU2dm82dXVmZExcvxcvcZDRU9ZYTpkUzFydFRSWjlVMnIwX241bzkyRk9WTlpldFVh" -H "Content-Type: application/x-www-form-urlencoded;charset=UTF-8" -d "grant_type=password&username=admin&password=admin" http://localhost:8280/login/

This is the response.
< HTTP/1.1 200 OK
< Content-Type: application/json;charset=UTF-8
< Cache-Control: no-store
< Email: test@test.com
< Gender: male
< Pragma: no-cache
< Server: WSO2 Carbon Server
< Date: Wed, 12 Sep 2012 09:54:30 GMT
< Transfer-Encoding: chunked

How to use clustering and replicating cache to improve performance and high availability of WSO2 API Manager

Performance is very critical factor when it comes to real product deployments. So most of use use cache to avoid unnecessary web service calls database calls. In WSO2 API Manager api gateway is the most critical thing if we consider performance. In real production systems we separate api manager in to several parts based on their functionalities.
01. API Gateway (All api calls hits gateway validation throttling happen here)
02. API Keymgt (Security validation part)
01. API Store (Allows users to subscribe apis / allow self registrations)
01. API Publisher (Allow publishers to create and publish new API's)
01. API Registry (Control registry)

So as you see API Gateway hits all inbound calls to apis. So most of production systems we recommend users to have 2 nodes clustered instead having one node. In this case you have to configure load balancer carefully to distribute load between both nodes. If you are using F5 like hardware load balancer make it session aware to get optimum performance and if you are using WSO2 Elastic Load Balancer it will take care of session awareness as well as service awareness for you. Both nodes should share same configurations and db and most importantly cache and carbon context. Because carbon context carries throttling related sensitive information. Also we use cache to cache keys to avoid unnecessary web service calls.

So first we will we how to enable clustering for nodes. Replace clustering section in repository/conf/axis2/axis2.xml with following configuration.


<clustering class="org.apache.axis2.clustering.tribes.TribesClusteringAgent" enable="true">
        <parameter name="AvoidInitiation">true</parameter>      
        <parameter name="membershipScheme">multicast</parameter>
        <parameter name="domain">wso2.carbon.domain</parameter>
        <parameter name="synchronizeAll">true</parameter>
        <parameter name="maxRetries">10</parameter>
        <parameter name="mcastAddress">228.0.0.4</parameter>
        <parameter name="mcastPort">45564</parameter>
        <parameter name="mcastFrequency">500</parameter>
        <parameter name="memberDropTime">3000</parameter>
        <parameter name="localMemberPort">4000</parameter>
        <parameter name="preserveMessageOrder">true</parameter>
        <parameter name="atmostOnceMessageSemantics">true</parameter>
        <parameter name="properties">
      <property name="backendServerURL" value="https://${hostName}:${httpsPort}/services/"/>
        <property name="mgtConsoleURL" value="https://${hostName}:${httpsPort}/"/>
        </parameter>
        <groupManagement enable="false">
       <applicationDomain name="apache.axis2.application.domain"
      description="Axis2 group"
     agent="org.apache.axis2.clustering.management.DefaultGroupManagementAgent"/>
        </groupManagement>   
        <nodeManager class="org.apache.axis2.clustering.management.DefaultNodeManager"
                     enable="true"/> 
        <stateManager class="org.apache.axis2.clustering.state.DefaultStateManager"
                      enable="true">
            <replication>
                <defaults>
                    <exclude name="local_*"/>
                    <exclude name="LOCAL_*"/>
                </defaults>
                <context class="org.apache.axis2.context.ConfigurationContext">
                    <exclude name="local_*"/>
                    <exclude name="UseAsyncOperations"/>
                    <exclude name="SequencePropertyBeanMap"/>
                </context>
                <context class="org.apache.axis2.context.ServiceGroupContext">
                    <exclude name="local_*"/>
                    <exclude name="my.sandesha.*"/>
                </context>
                <context class="org.apache.axis2.context.ServiceContext">
                    <exclude name="local_*"/>
                    <exclude name="my.sandesha.*"/>
                </context>
            </replication>
        </stateManager>
    </clustering>
 

Do this for both nodes. Refer  this article on cluster configurations if you need more information.

Now we need to enable replicate cache between two nodes.

1.In your setup caching synchronization should be done based on a predefined multicast ip and a port.
The caching synchronization is done by Jgroups multicasting - and you can specify a port and the address if needed as system properties by updating wso2server.sh.

-Djgroups.udp.mcast_addr="224.10.10.10" \
-Djgroups.udp.mcast_port="5555" \

Add following configurations to repository/conf/etc/cache.xml
<configuration>
        <clusterName>apimanager-cache</clusterName>
        <cacheMode>replicated</cacheMode>
        <sync>true</sync>
        <l1>
            <enabled>true</enabled>
            <lifespan>60000</lifespan>
        </l1>
    </configuration>

2. Specify valid<HostName>in carbon.xml
3. If you do not want to replicate user-core caches among nodes, add unique cache identifiers for each node as a child under the corresponding

<UserStoreManager>
(JDBCUserStoreManager or AD) of user-mgt.xml
<Property name="UserCoreCacheIdentifier">node2</Property>
i.e:- Since we use separate user stores for publisher and store, user-store caches should not be replicated among those nodes. Hence, we can add two different cache identifiers for each publisher and store nodes.
In store:
<UserStoreManager class="org.wso2.carbon.user.core.jdbc.JDBCUserStoreManager">
<Property name="UserCoreCacheIdentifier">node2</Property>

In publisher:
<UserStoreManager class="org.wso2.carbon.user.core.ldap.ActiveDirectoryUserStoreManager">
<Property name="UserCoreCacheIdentifier">node1</Property>
4. Start servers with -Dbind.address= system property

Repeat same for other node as well. If you done configurations propery you will see cluster joining messages in output log of api gateway nodes as follows.

[2012-09-04 16:22:39,265]  INFO - TribesMembershipListener New member 192.168.115.218:4000(wso2.carbon.domain) joined cluster.

[2012-09-04 16:22:41,061]  INFO - TribesClusteringAgent Local Member 192.168.115.218:40(wso2.carbon.domain)

[2012-09-04 16:22:41,062]  INFO - TribesUtil Members of current cluster

[2012-09-04 16:22:41,062]  INFO - TribesUtil Member1 192.168.115.218:4000(wso2.carbon.domain)

If you enabled logs for jgroup you will see following messages as well.

[2012-09-04 16:22:27,278]  INFO - JGroupsTransport ISPN000094: Received new cluster view: [sanjeewa-TECRA-M11-23170|2] [sanjeewa-TECRA-M11-23170, sanjeewa-TECRA-M11-37541, sanjeewa-TECRA-M11-17759]

Please note that keeping other configurations as default is fine. But you have to configure gateway, store, publisher, registry, keymgt in a way they aware about each others. With this type of deployment you will be able to achieve great performance. To fine tune API gateway node please refer my previous blog post which describe how improve response time of api calls.

Empowering the Future of API Management: Unveiling the Journey of WSO2 API Platform for Kubernetes (APK) Project and the Anticipated Alpha Release

  Introduction In the ever-evolving realm of API management, our journey embarked on the APK project eight months ago, and now, with great a...